Over the last three weeks, I’ve been asked a lot of questions about audio gear by my friends and colleagues. I don’t think I’m an expert on this, but I know enough to be dangerous (ie. spend other people’s money). Teaching lessons over video chat is hard and weird and different and lower fidelity in almost every way compared to teaching in person. And the thing I’m asked most often is “what microphone should I buy?”. My answer to this question has changed somewhat.
First, the thing that hasn’t changed: You don’t need to buy a mic at all. You’ve already spent a lot of money on a lot of things, and there are a lot of uncertainty surrounding the future of the economy and institutional finances. Also, like digital cameras, your phone and laptop have been getting better and better, so cheap external microphones probably aren’t a ton better than what you already have (though a benefit is that you can control the placement a bit more if it’s not attached to a computer or phone). With that important caveat out of the way, here are my recommendations.
Initially, I was recommending the AudioTechnica ATR–2100X. It’s a dynamic mic very similar to a Shure SM57/58. It has the benefit of working both as a USB microphone (can plug directly into a computer) and a traditional analog microphone (can plug into standard professional audio gear). That means it can grow with you. It happens to also be an exceptionally good vocal mic should you decide that this is the time to start your hit true crime podcast. I’ve had its predecessor (the ATR–2100[1]) for years, and it works great. It costs around $100 on Amazon—if you can find it—so it’s not exactly cheap, but still on the low end when it comes to microphones. This is a really good mic, and if you picked it up on my recommendation, I stand by it. Since then, though, I’ve had another idea that I think could be even more useful.
Ideally, if you’re going to spend money on something to help with your online remote lessons—and again, no one should feel that obligation—an even more useful option would be something that will continue to serve you in other situations as well. One thing that we all deal with is making recordings of rehearsals and concerts when we don’t want to lug a ton of gear or can’t reasonably sneak a laptop into a dark concert hall. For that reason, I think an even better purchase might be a small portable recorder. I really like the ones from Zoom (not the video chat service!). I’ve had a Zoom H4n for over a decade and it’s still going strong. For almost the same price as the ATR–2100X, you can pick up a new Zoom H1n portable recorder. These are amazing little multitools because they’re tiny, have really good microphones for the money, and they can work as a USB microphone when plugged into a computer or as standalone recorders for a time when we can all enjoy one another’s company again.[2]
I’m sure I’ll have more thoughts on this stuff later. As I’ve said a bunch of times this week, every sentence I say or write these days has an implied “for now” at the end of it. These are my thoughts (for now).
If you don’t mind the older-style mini-USB port, you might be able to find a good deal on this model if it’s still in stock anywhere. The sound and build quality is identical. ↩
In the last few days, I’ve been to a lot of meetings and participated in a lot of online discourse about moving face-to-face classes online. If I could convince my peers and colleagues of one thing, it’s this: an online version of your class should not try to imitate a face-to-face version of the same class. Use the medium for what it’s good at.
I used to teach a lot of online classes at a previous institution. Much of the time, I was teaching a campus and online version of the same course, at the same time, and roughly at the same pace. While the concepts and outcomes were the same, the methods and assessments were different.
Here are a few things to consider:
If you have a class with a lot of 50- to 75-minute lectures, maybe you don’t really need to replicate this same thing. You’d be surprised at how short you can make a tightly scripted video[1] that covers the same material. You don’t need to slow down or repeat yourself as much if students can pause, cross-reference, and rewatch. Perhaps even better, you might use a pre-existing video and focus your time and energy on another area of the course. For my music theory colleagues, I highly recommend Seth Monahan’s excellent YouTube channel.
If you have discussions, these can be even harder to manage in online videoconferences than they are in person. Even with video, the visual cues that a person is winding down or ready to jump in aren’t as apparent. Consider a text-chat platform like Slack that can allow realtime conversation that is threaded. If the face-to-face experience is important to you, consider ways to make the discussion group smaller. Perhaps divide the class in two and have the same discussion twice (maybe half as often or half as long) so that each person can contribute more. Or maybe have the discussions run concurrently (Zoom breakout rooms). It’s possible that your students could have an thoughtful, salient, and rigorous discussion without your calming, Socratic presence.
Consider assignments. Focus on your outcomes. What skills and content are you imparting. Maybe your students need more and smaller assignments when they’re working on their own. Maybe they need larger, scaffolded assignments. If you’re worried about academic honesty when all assignments are digital and instantly, infinitely copyable, consider making your assignments more open-ended and creative. Instead of dictating a melody, write a melody for another student to dictate. Instead analyzing a phrase of music, find a repertoire example that expresses the theoretical model. These kinds of assignments require students to think independently in a way that corresponds to the independence of a remote learning environment. When you are trying these new kinds of assignments, be very clear about what you’re asking students to do. In your campus class, you probably spend a couple of minutes talking through a homework assignment before students go off to work on it. You might be surprised at how much direction your students take from those few sentences. For remote classes, expectation clarity is something you might have to work harder at than you’re used to. As a very small example, I end almost every assignment I give on Blackboard with a “Deliverables” heading in which I list exactly what files I expect students to submit and in what formats, and I think it helps a lot.
Keep in touch. Your campus students are used to seeing you around. You might say hello or hear them perform. You might see them at lunch. The worst part of my remote teaching experience was the way it dehumanizes us. We forget that the person sending these emails and posting these files is a person. Post regular updates with your face and voice just to say hello and be a person. It’s easier for us in this transition since already know one another face-to-face, so that might make it easier to keep up. Anytime you’re on the phone or sending an email or posting an announcement or writing grade feedback, remember that the person writing it is a person, not an anonymous computer file, and encourage your students to do the same. I’m not saying you need to become the Cool Parent type of professor (unless that’s your thing). Just be a person and give your students space to do the same. Opportunities for doing this are built-in to the campus experience, but you might have to go out of your way a bit more to bring it to your remote class.
Teaching remotely can be just as fun, rewarding, student-centered, and rigorous as teaching face-to-face. We still need to keep in mind (myself as much as anyone) that these are different things. Some things that work great in one format won’t work at all in another and vice versa. Use each instrument for what it’s best at. Don’t try to play the viola like it’s a clarinet.
I know it might sound like more work, but a good plan and a good script will save you time in the long run, especially where captioning is concerned. Upload your video to YouTube, paste in the script, and you will have a much more accessible lesson. This avoids the pitfals of YouTube’s autocaptioner and the tedium of correcting it. ↩
A common thought experiment in studying music composition is to develop a new system of notation. Musicians generally acknowledge that our system of staff notation is imperfect, and imagining alternatives is a way of focusing on the musical parameters that you care about most, rather than the ones that are the easiest to identify in a score.
I have a student in my Theory 1 class at WSU who is blind, so I’ve been learning a lot about braille and braille music notation. She is an excellent pianist, and I’m thankful that she is comfortable with braille already. There are estimates that fewer than 10% of legally blind Americans can read braille[1]. But even though my student has no problems reading music braille, teaching theory has already been a bit of a challenge.
Music braille, it turns out, is an ongoing experiment in developing a new form of music notation. The latest edition of the standard was published just a few years ago. If you’re familiar with staff notation[2], you’ll likely be quite surprised by how sounds are represented. Here are a few highlights:
There is no staff.
It uses the same characters as written braille, just interpreted in a different way.[3]
Clefs are optional (used mostly to be academically faithful to the source). Notes are identified by letter name. ASA octave numbers are used to disambiguate when needed.
There are different versions of letter name characters used for different rhythm values.
Key signatures are often shown only by number of sharps or flats (“four sharps”).
Barlines are optional.
Beams do not exist in braille.
Simultaneous pitches are shown by giving one note, and then a stack of intervals from that note.
Music braille, like other forms of braille, usually takes a lot more space than staff notation. Because of this, supplementary annotations like measure numbers are often left out.
So much about how (royal) we teach music theory is tied to the staff notation we use to transmit it. In fact, I’m beginning to think that the way we think about how music is constructed has a bit of a heuristic bias informed by staff notation.
I still have to talk about staff notation in lectures, and use it in assignments, and as descriptive as I try to be, as demonstrative as I try to be singing or playing piano, there are inevitably things that get lost. A couple weeks ago, I was describing how and where on the staff to write accidentals, and this student raised her hand and politely asked if I could describe what sharps and flats looked like. I did my best, but I was a little stumped.
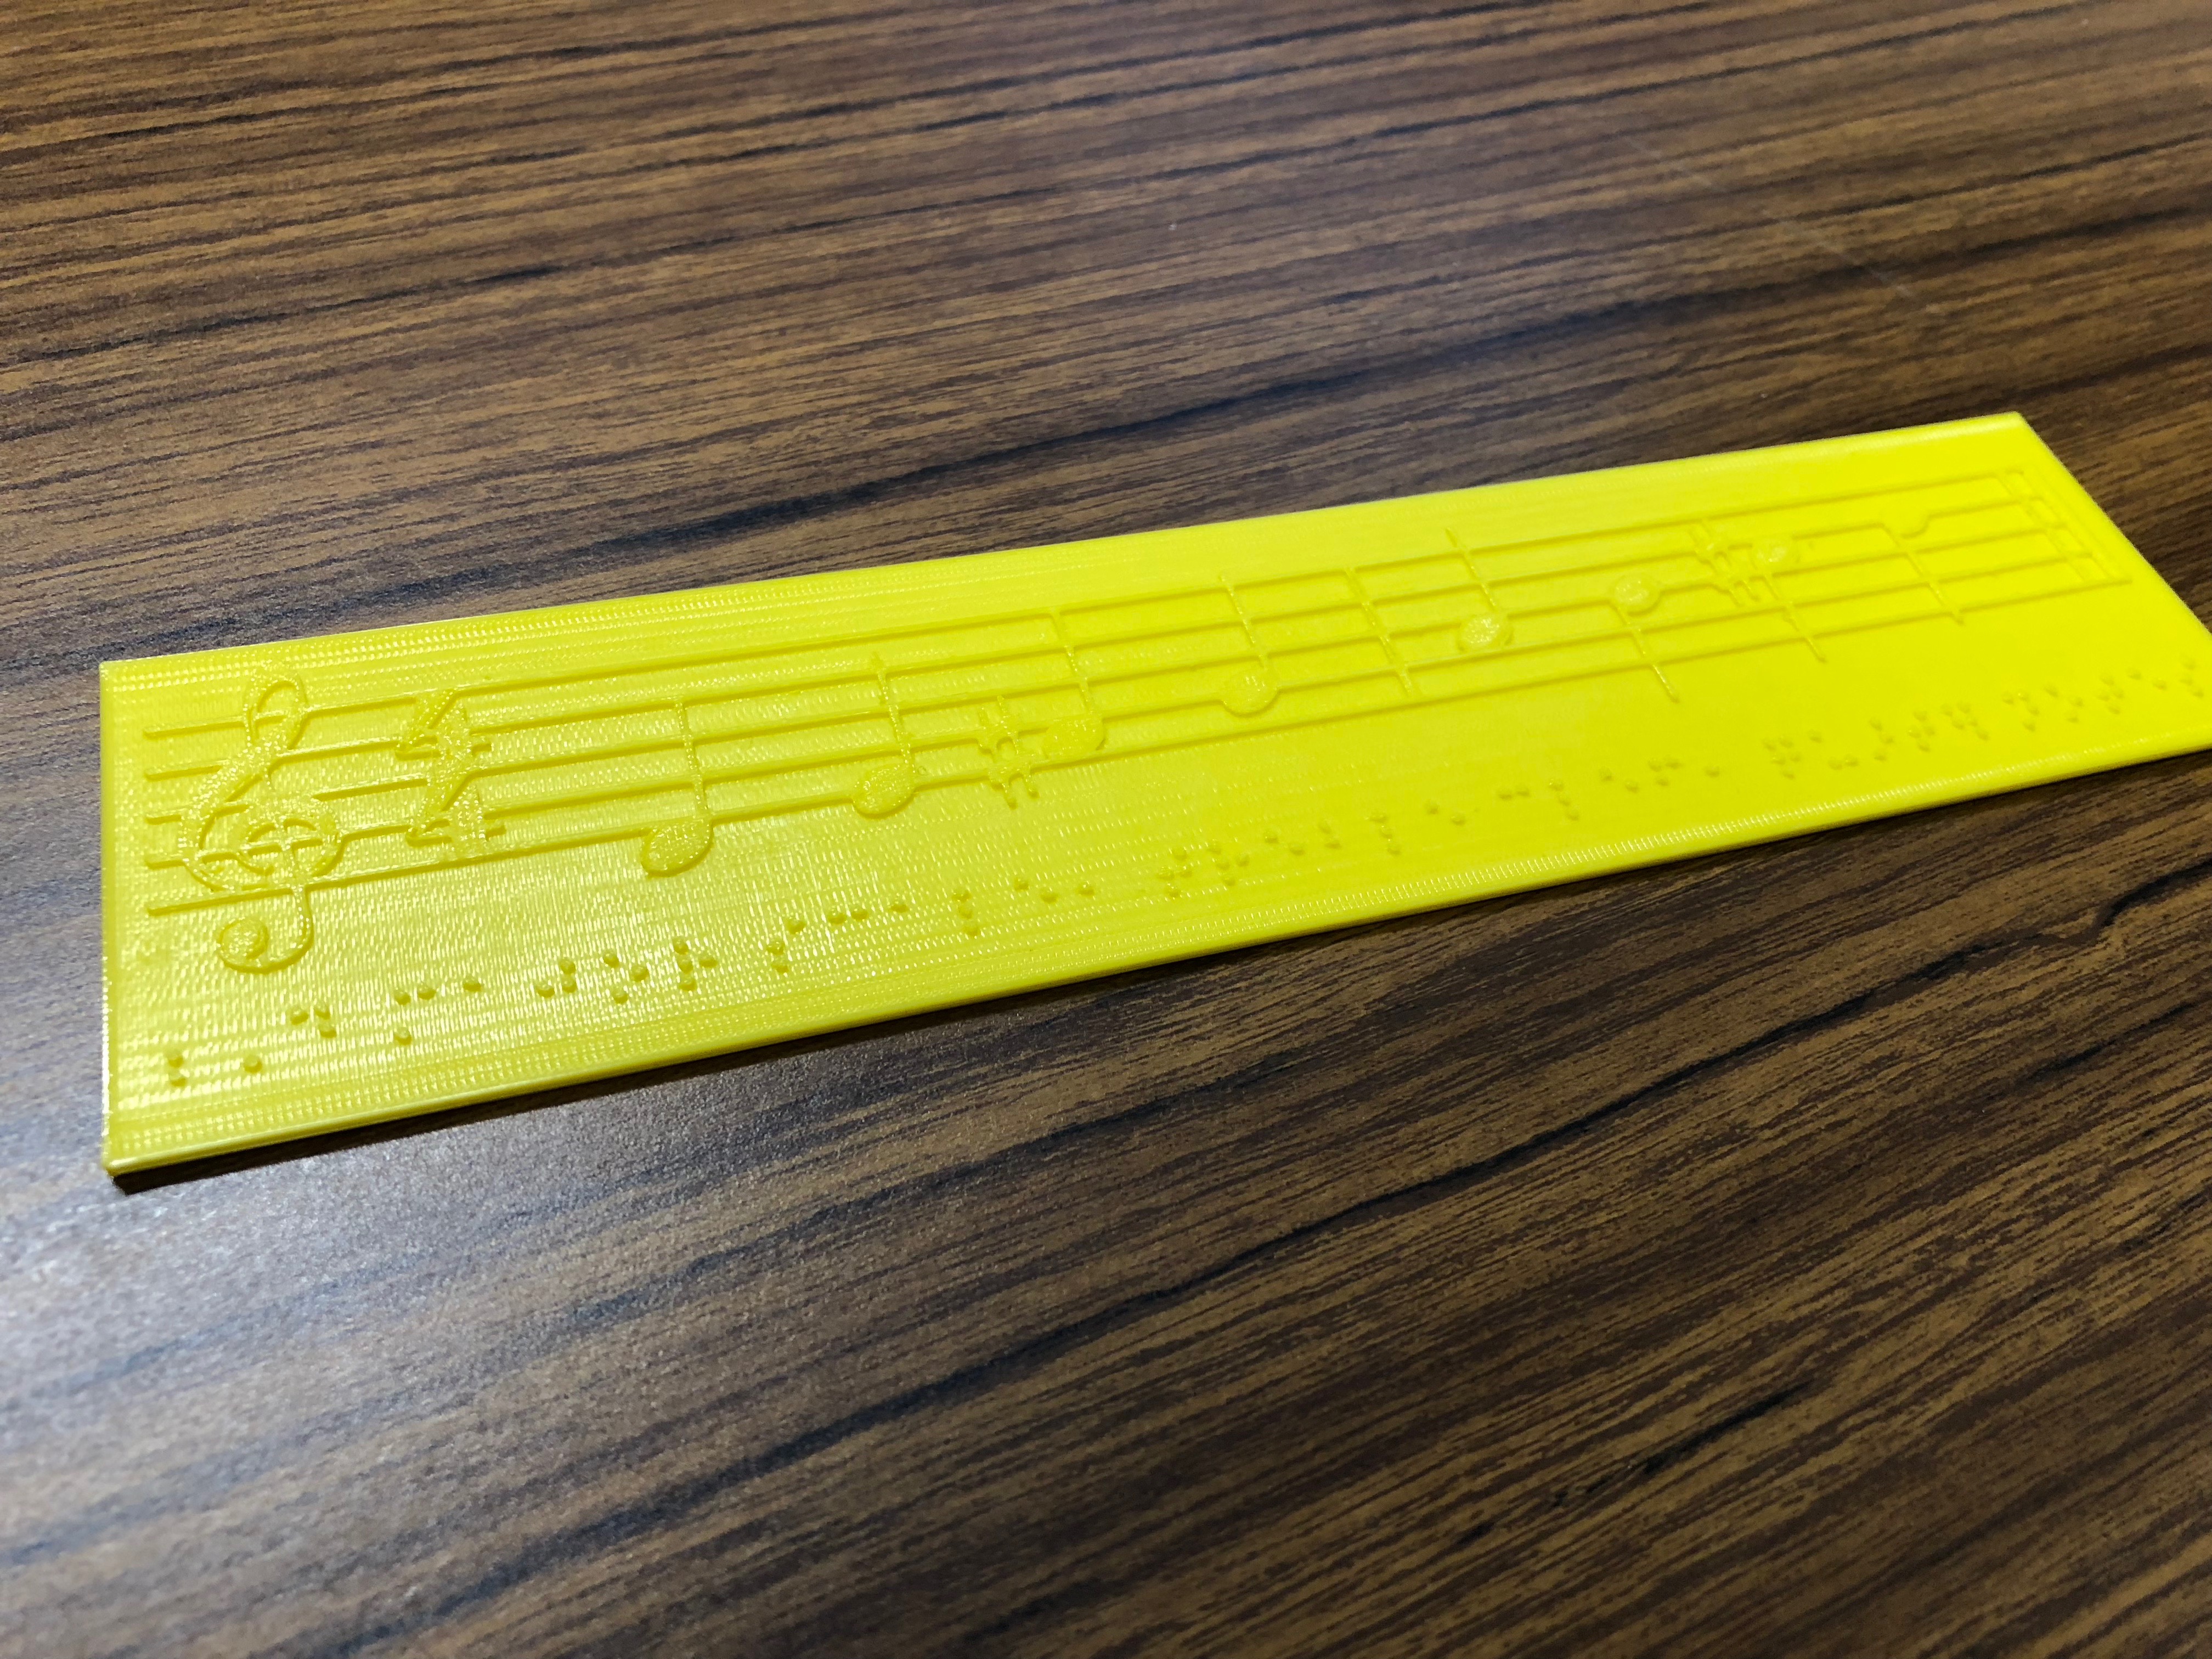
I did, however, recall hearing about the 3d-printing facilities in the library in one of the many, many, many orientation sessions from last month. I’m a nerd. While I’d never 3d-printed, but I’ve always thought it sounded like a cool thing. So after a couple of attempts, I figured out how to make a 3d model of a tactile major scale that I could hand my student so she would know how clefs, noteheads, and accidentals interact with the staff. She told me that the print helped her to understand things that she’d heard musicians discuss her whole life.
A few people have asked about the CAD files, and since they seemed to actually help the student, I’ll share the major scale file here. The braille is a written description, not music braille.
If anyone is curious about how I went about making the 3d model, I’m happy to share what I learned. Get in touch. Maybe I’ll do another post. I’m a total n00b, but I figured it out. In the meanwhile, let me know if you use the file above and how it goes.
To be clear, this population includes those who can see well enough to read print and screens, but the National Federation of the Blind still describes this as part of a larger literacy crisis ↩
“Staff notation” is the name I̵7;ve settled on for the kind of notation I grew up reading. “Visual notation” doesn’t seem specific enough, and the staff is more descriptive of what it actually is, rather than how it’s read. ↩
This is also true of letters and numbers. Special characters can precede a string indicating that it should be read as letters, numbers, or music. ↩
President Donald Trump holds notes during a White House listening session with students and parents affected by school shootings. (AP Photo by Carolyn Kaster) pic.twitter.com/CpWd8B4k5q
What would you most want me to know about your experience?
You will never understand another person’s experience because you lack the capacity for empathy. Your lack of shameless lack of self-awareness is problematic enough. Let’s not stress your intellect by attempting to make yourself aware of another human’s experience.
What can we do to help you feel safe?
Stop making and selling guns, especially military-style guns, but honestly all of them.
Do you think see something say something is effective?
Not the way it’s been discussed by (mostly) you over the last few days. It stigmatizes mental illness and developmental disabilities. Ostracizing people makes problems worse, not better.
This is a short guide I wrote for my students. I’m putting it here mostly so I can link to it. I’d also appreciate any feedback.
Program notes are challenging for everyone. There are lots of reasons you might struggle to write them.
You’ve already written the whole piece. Isn’t that enough? I mean, you wrote a second bassoon part!
Your music is a perfect snowflake that speaks for itself.
You’ve spent years learning to create things out of sound, not words.
Despite these challenges, writing a good program note for each piece is an important way of relating to the audience that you care about their experience listening to your music. After all, program notes are not a prerequisite course to attending a concert. You should expect that many—if not most—of those hearing your music will not read them. However, a well crafted bit of prose can help a curious listener to better understand you as a composer, you as a person, your music, and maybe even music generally. Here are a few things to keep in mind when composing your program notes.
Consider the Audience
Some people at a concert might have extensive training in music theory. Some of them may be music history buffs. Some may have extensive collections of Milton Babbitt records, while some others have extensive collections of Kenny Chesney tour posters. If they’re in the room when your music is played, you have to assume that they are thoughtful and curious, and that’s about all you can assume. Describe your music in terms that are precise, yet that can be easily understood. This is a difficult balance to strike. Consider this paragraph by Alex Ross describing Britten’s Serenade for Tenor, Horn, and Strings:
The strings begin with a “natural” open fifth on E and B, which pulses weirdly off the beat. The horn starts on the note G-sharp, forming a clean E-major triad, then falls to a G-natural, darkening the harmony to minor—a heart-sinking effect of a kind that appears often in Schubert and Mahler. The horn spirals through a circuitous, spasmodic pattern, creeping along in close semitone intervals and then leaping by fourths or fifths. The tenor recites the Blake text in the space of only eight bars, repeating the major-to-minor, light-to-dark shading of the opening. Afterward, the horn reprises its solo, and at the very end the first two notes are played in reverse order, G-natural to G-sharp. Thus, the piece closes in E major. But it is hardly an optimistic resolution; it is the worm’s victory. Britten had discovered one of the core techniques of his dramatic language, the use of simple means to suggest fathomless depths.
Ross uses some jargon, but always shaped by some non-technical description. Semitone intervals are “creeping along”, while fourths and fifths are “spasmodic” and “leaping”. Remember you aren’t writing a theory dissertation on your own music. Your program notes should find a welcoming middle ground that communicates to novices and experts.
Write What You Know
You don’t need to invent things to make an interesting program note. Some composers are infamous for word-salads of hand-wavy gibberish. Don’t be like those composers. Instead, tell us something that you as the composer know that we as the audience don’t. Think about answering the questions you might ask of the composer of a work you really enjoy. This might be why you decided to write for this particular medium, what the title means to you, anything interesting that came up during the process, or an experience you had working with the performer, commissioning party, conductor, or librettist.
Be a Tour Guide
Invite us into your music and show us around a bit. You have some interesting musical ideas here, and we’ll have more enjoyment and appreciation if we understand clearly what those ideas are. Tell the audience what specific ideas they could listen to in the piece that might help them to understand how the work moves from beginning to middle to end: this could be the main motivic ideas, the texture and orchestration ideas, the relationship between the text and the pitch, or the way different rhythmic or contrapuntal ideas interact with one another. This is a dangerous and slipperly slope, though. Nobody wants to read a play-by-play of the baseball game they’re about to watch. Without spoiling any surprises, tell us in the audience what we sounds we might listen for that will help us to follow along as the piece unfolds. Always remember that you spent more time with this music than anybody, and the audience is likely to only hear it this one time, so it’s up to you to help them get the most out of that one hearing.
Conclusion
Writing a program note can often turn out to be as challenging as—or sometimes more challenging than—writing the piece of music they accompany. However, a good program note can enlighten your audience and get them even more excited to hear your music. It’s also excellent practice for talking about your music, because it gives you some practice in putting together a coherent set of thoughts that you can use when speaking with listeners, performers, conductors, and friends. Communicating effectively about music is one way you can stand out among the many immensely skilled and creative musicians.
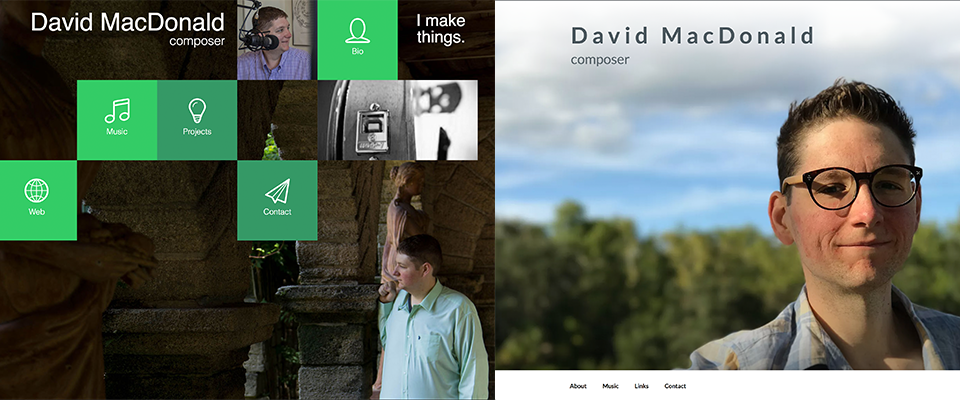
Over the last few months, I’ve slowly been working on a redesign of my personal site. I had been helping out with several other sites for individuals and organizations, and felt like my old site was becoming the proverbial cobbler’s child. The design language was starting to look a little dated, and it didn’t do anything that might encourage anybody to stop by for a visit.
Last and perhaps most crucial to the rebuild, one of my goals for the year has been to at least make it possible for people to pay me. I don’t want my site to be a store, but if I’m going to go to all the trouble of making a page for each piece I want to showcase, I might as well put a buy button down there at the bottom. I know this is probably something lots of composers are interested in trying, but if you don’t have a lot of resources to hand that off to a team, you may not no where to begin. I certainly didn’t. So I thought I’d share a bit of what is going on behind the scenes on the new site.
The Guts
I like WordPress. Every version of my website for the last 15 or so years has been built using it. SoundNotion, CFCF, Timucua, and a half-dozen other little web experiments are all self-hosted WordPress (aka “WordPress dot org”) using cheapo shared hosting at DreamHost. The domain is registered at Hover. WordPress isn’t the only game in town when it comes to content management systems (CMSes); but it’s by far the most widely used, so there are tons of options for supporting technology, helpful YouTube tutorials, how-tos, plugins, and themes. As I tell my students, if you’re new to this stuff (or even if you aren’t) anything other than WordPress or Squarespace will probably end in tears.
The Pretty Parts
I can be a bit picky with things like colors, typography, layouts, and I’m a total snob about some of it, too. (I’m sure those who have met me have no trouble imagining that.) So finding a theme I like is always a struggle. I don’t want a hand-holdy visual builder, though there are some fantastic ones available, but I do want to take control. The theme here at This Page Left Intentionally Useless is one I built from scratch. That turned out to be a lot of work, so I’m comfortable building on the shoulders of people who know what they’re doing. My new site is built on the default Twenty Seventeen theme in WordPress. I really like Twenty Seventeen; it’s also at the core of the Timucua Arts Foundation site I worked on earlier this year. All the tweaks are nerdy and done in PHP and Sass. Wake up. We’re getting to the good stuff!
I wouldn’t recommend this level of geekery to a normal person. If you want to take control of your site, find one that has some nice customization features baked in. There are some really nice ones you can pick up for under $50, and if you raise your budget to $100 or so, you’ll find just about anything you can imagine. One theme I toyed with a bit during my build is Divi from Elegant Themes. It’s beautiful and highly customizable. At $89/year it’s starting to push into the moderately expensive range; but, you can really do a lot with its drag-and-drop page builder. If that sounds like a lot, there are some great options with less support and fewer customizations on Theme Forest.
The Functional Parts
I could go into a lot of detail on all the plugins I’m using on the site1 and why; but, I think we both know the reason you read this far. You want to know about the money stuff.
There are several ways to do e-commerce. I used Gumroad for many years, which I still think is great. However, I really wanted to be able to take care of the transactions myself. I’m never going to be selling scores at a scale that requires the heft of Gumroad’s server capacity, and I think it’s a better experience for folks to begin and end the transaction on my site.
I’m using WooCommerce, an absolute behemoth of a plugin. It’s maintained by Automattic, the same company responsible for the main core of WordPress, so it’s pretty stable, even if it is a much larger tool than I need for my tiny little shop. That’s ok. As I said, scale isn’t a concern here.
Some things were concerns, though. Most important was that I didn’t want my personal site to scream “BUY MY STUFF” all the time. Obviously, that’s not a common trait among online retailers, so WooCommerce’s default settings needed to be reined in a bit. Instead of a store, I want my site to be more like a portfolio in which you happen to be able to purchase copies of some of the work.
First came the navigation. Instead of letting Woo create its own store page, I decided I wanted to manually create my own listing. I don’t have enough things in the “store” to make this a huge burden.
Next, I wanted a much less aggressive template for each piece, and to even have pieces in the “store” that aren’t for sale. Again, Woo’s default is to make the price and the “add to cart” buttons the first thing on the page, just like an Amazon listing. For my site, I want that to be at the very bottom. This required a teensy bit of code-tweaking to change the template order. I didn’t look too far for a plugin, since I was already doing some template tweaks on the site. You may be able to handle this in a less geeky and possibly more effective way.
Last, since my scores aren’t particularly interesting to photograph, I hid the “featured image” and “gallery” that Woo wanted to create for each piece. Instead, I just begin each entry with an embedded video or audio player if I’ve got it, followed by a program-note-like description.
The Voice
Re-doing things gave me the opportunity to reëvaluate2 the writing on the site. I like to write long silly things like this that don’t always belong on the main site, but I still love writing words from time to time. Writing a bio is never fun though. I dug back through the series of posts Angela Myles Beeching wrote for New Music Box about a year ago, “Your Better Bio”. I’m still not sure I have it nailed; but, it’s much closer and says more about my music and me as a person than it ever has before. I’m tempted to write a little plugin that randomly changes some of the cheekier bits each time the page loads. Bios are hard and have a lot of different potential audiences, especially on a website, where readers include audiences, performers, presenters, grant reviewers, and hiring committees. Also my mother. Hi, mom.
Conclusion
I consider this project to be very much in the “minimum viable product” stage. I have put a sign-up for a mailing list in a few spots. I thought about the modal pop-up thing some sites used, but I decided that I hate it when those pop up in front of something I’m reading. Why would I shove that in front of people I like? It’s there all the same if you’d like to sign up. I don’t know yet what I’ll put there, but I promise it will be cool. Signer-uppers get a $10-off coupon in my portfolio/store/thing. I’m planning to add at least one more page that has some information on my other weirdprojects, and maybe some links to a bit of my writing that I end up sharing or linking a lot.
If you have any thoughts on the site, I’d love to hear them. As you can see, I also love talking about making tech things, so if you have questions about anything I’ve done there, I’m happy to answer them.
You really want to know? Ok, pal. Here’s each active plugin on the site as of this writing: Better Font Awesome, Google Analytics by WebKinder, Jepack by WordPress.com, SendGrid, Under Construction, VaultPress, WooCommerce, WooCommerce Services, WP Mail Logging, WP Migrate DB, WP Responsive Embeds, WP Subscribe Pro. Happy now? ↩
There’s a plugin for that. Express sarcasm and condescension in a way normally reserved for face-to-face interaction, all while working from home.
UPDATE (18 Aug 2017): You can now install this plugin directly from the WordPress plugin directory. Just search for “So-Called Air Quotes” from your WordPress dashboard. Now, it’s official.
Update 30 March 2017:I made a neat (I think) little tool for generating these iframe embed codes automatically if you don’t want to keep digging around the iframe code.
With the update to Keynote 7.1 (27 March 2017), Apple added the ability "post interactive presentations on Medium, WordPress, and other websites". It’s a little bit tricky to find. Here’s how to do it.
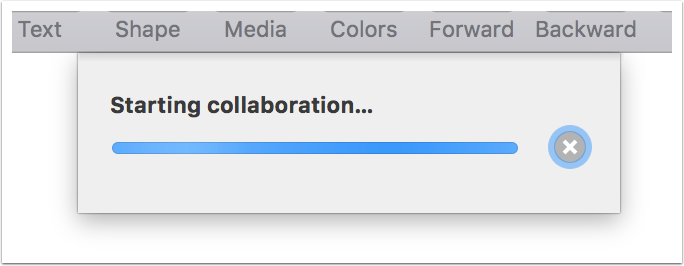
Click "Collaborate"
If you don’t have the Collaborate button in your toolbar, you can also go to Share > Collaborate With Others. I know. It doesn’t make a ton of sense, but stick with me.
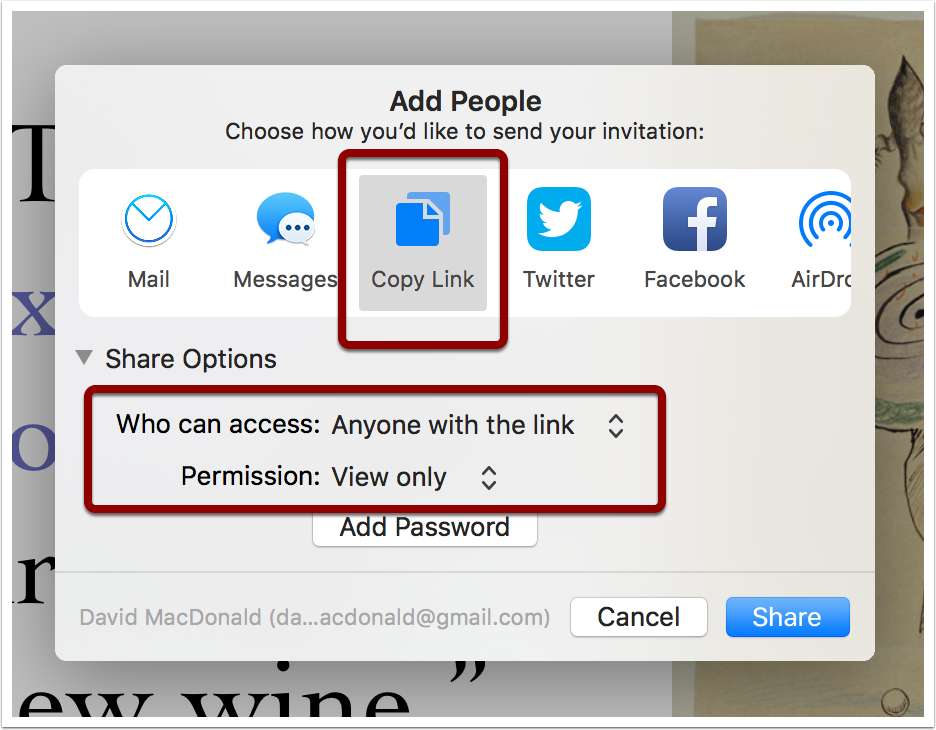
Set your sharing options.
Select "Copy Link", and under Share Options, set the access to "Anyone with the link". Set the Permission to "View only". Click Share and wait for Keynote to do a little iCloud dance in the background.
Wait.
Depending on how large and complex your presentation is, it may take a while. When this is done, you have a URL on your clipboard. Keynote doesn’t really tell you anything about that, but trust me. It’s there.
Post on Medium
In any part of a Medium post after the title, paste the URL and hit Enter.
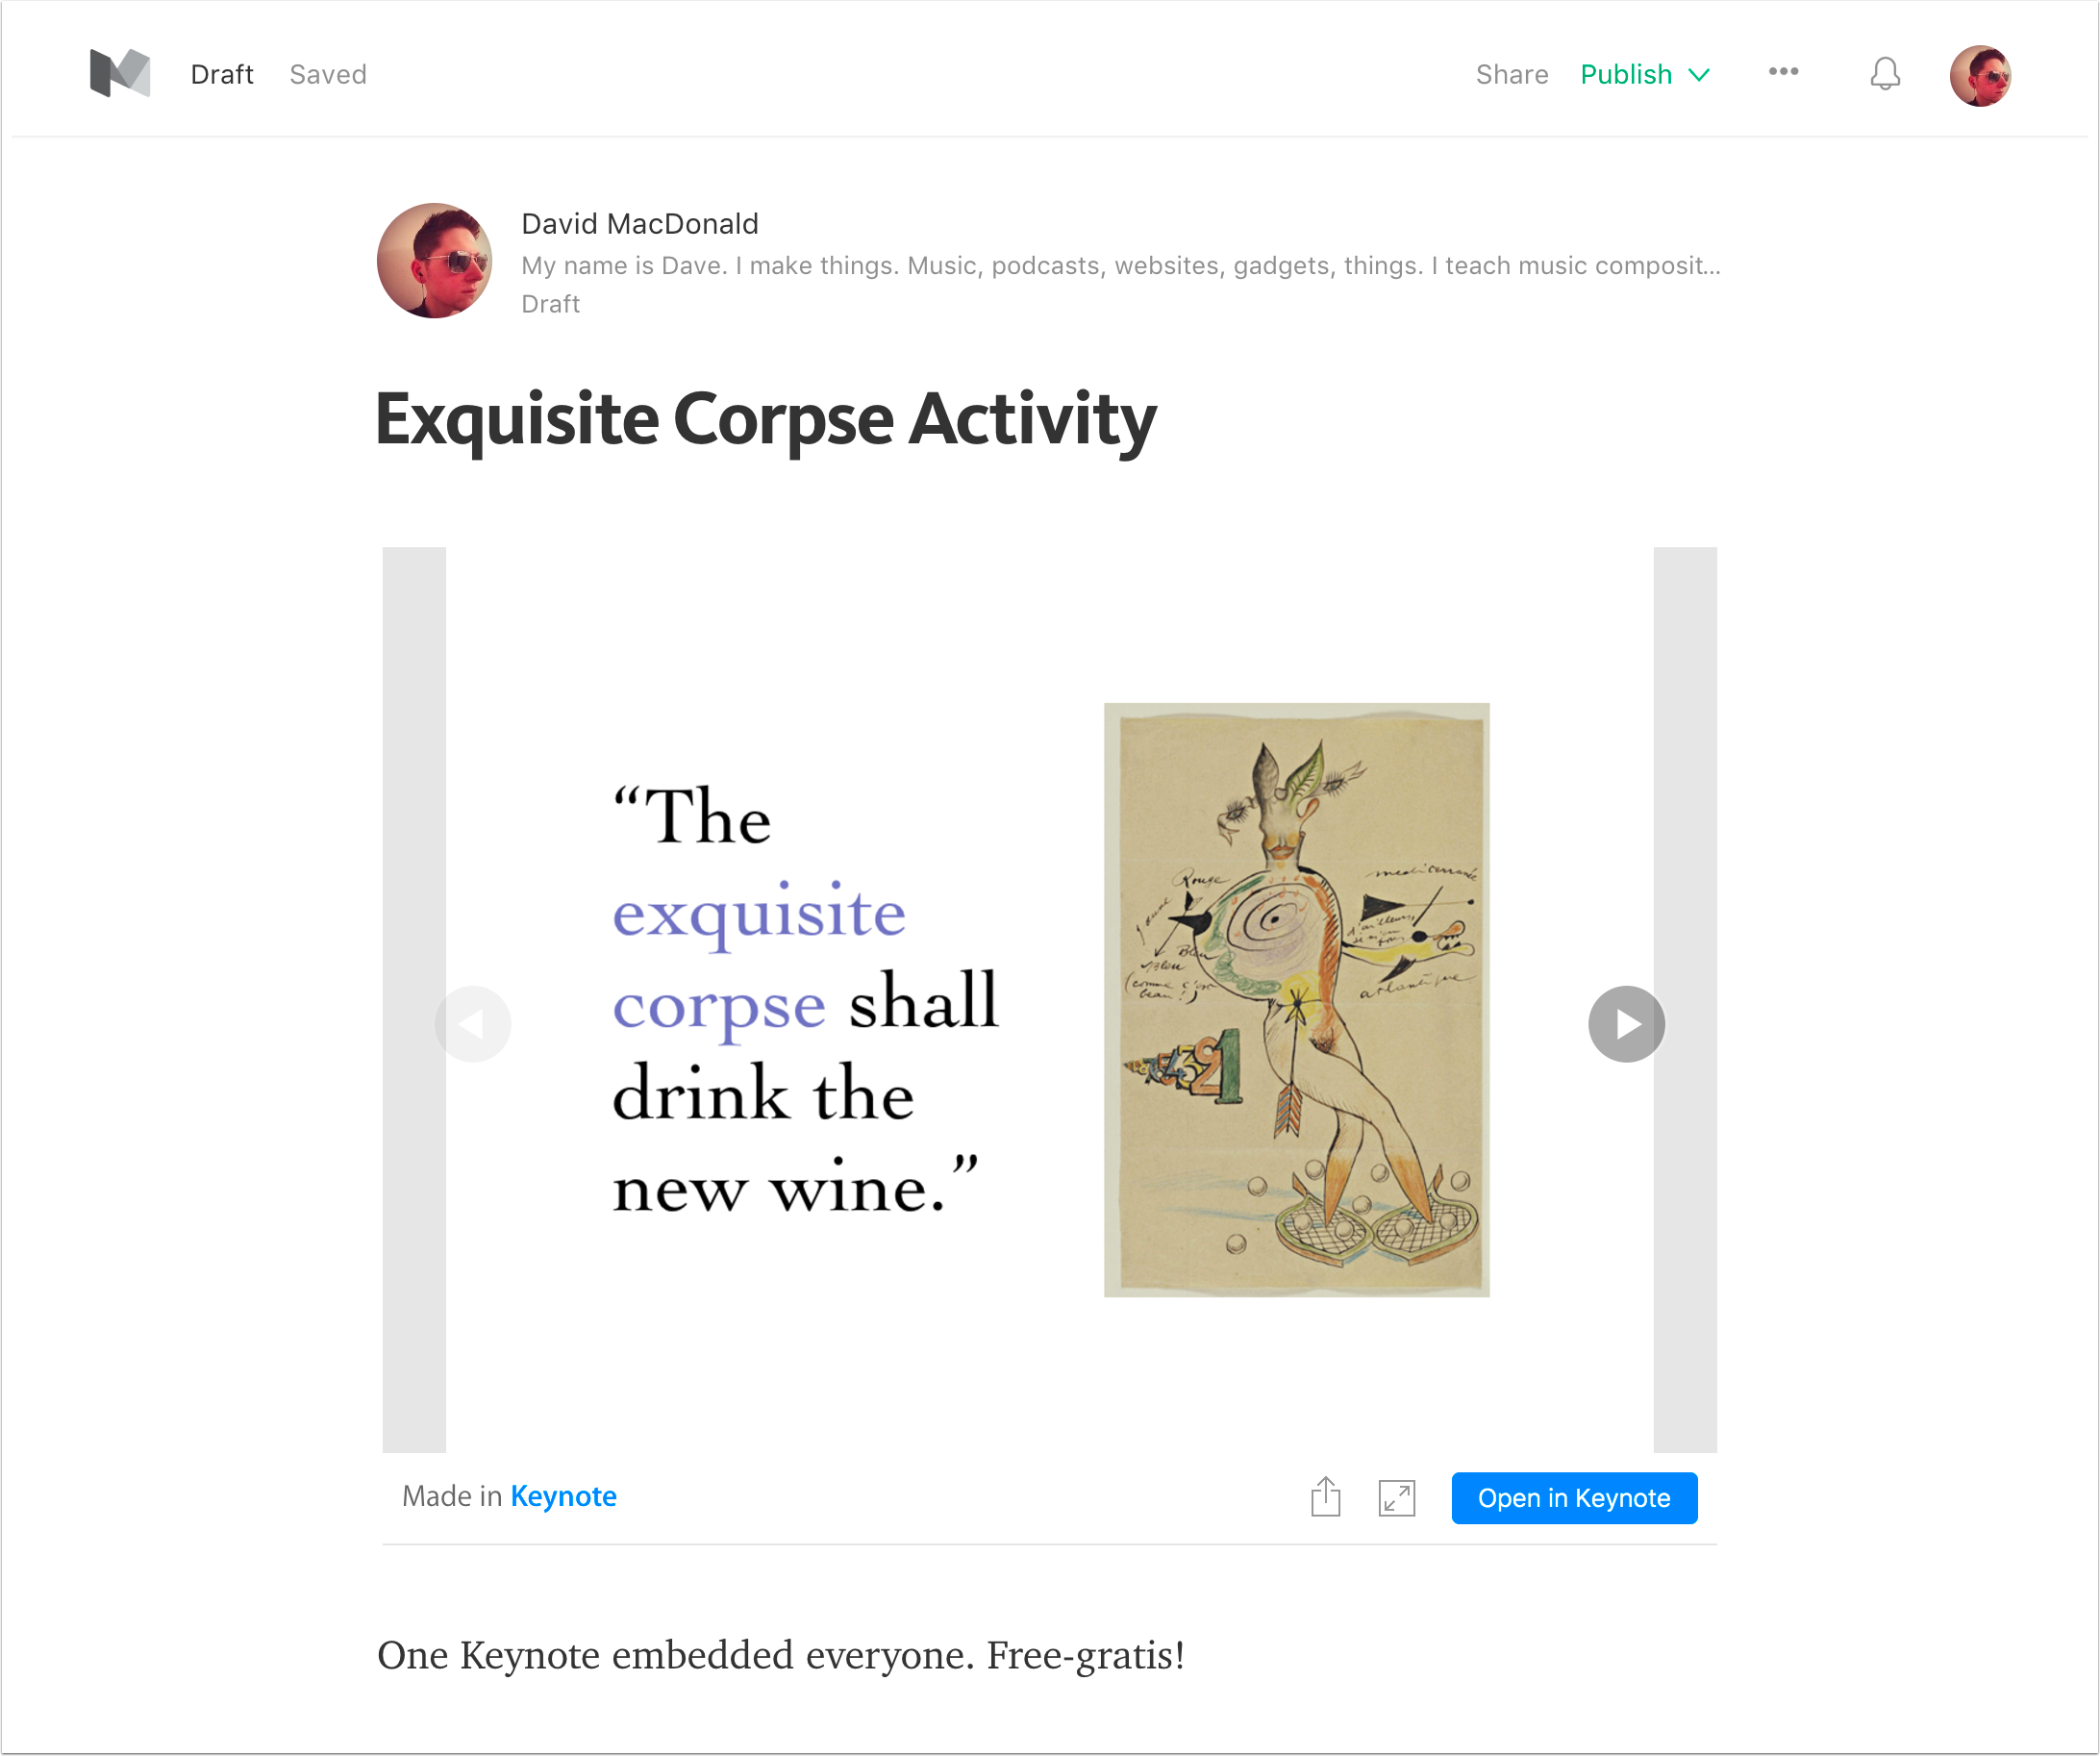
After a few moments, the URL will be replaced by an embedded slideshow. Looking good!
Post on WordPress.com
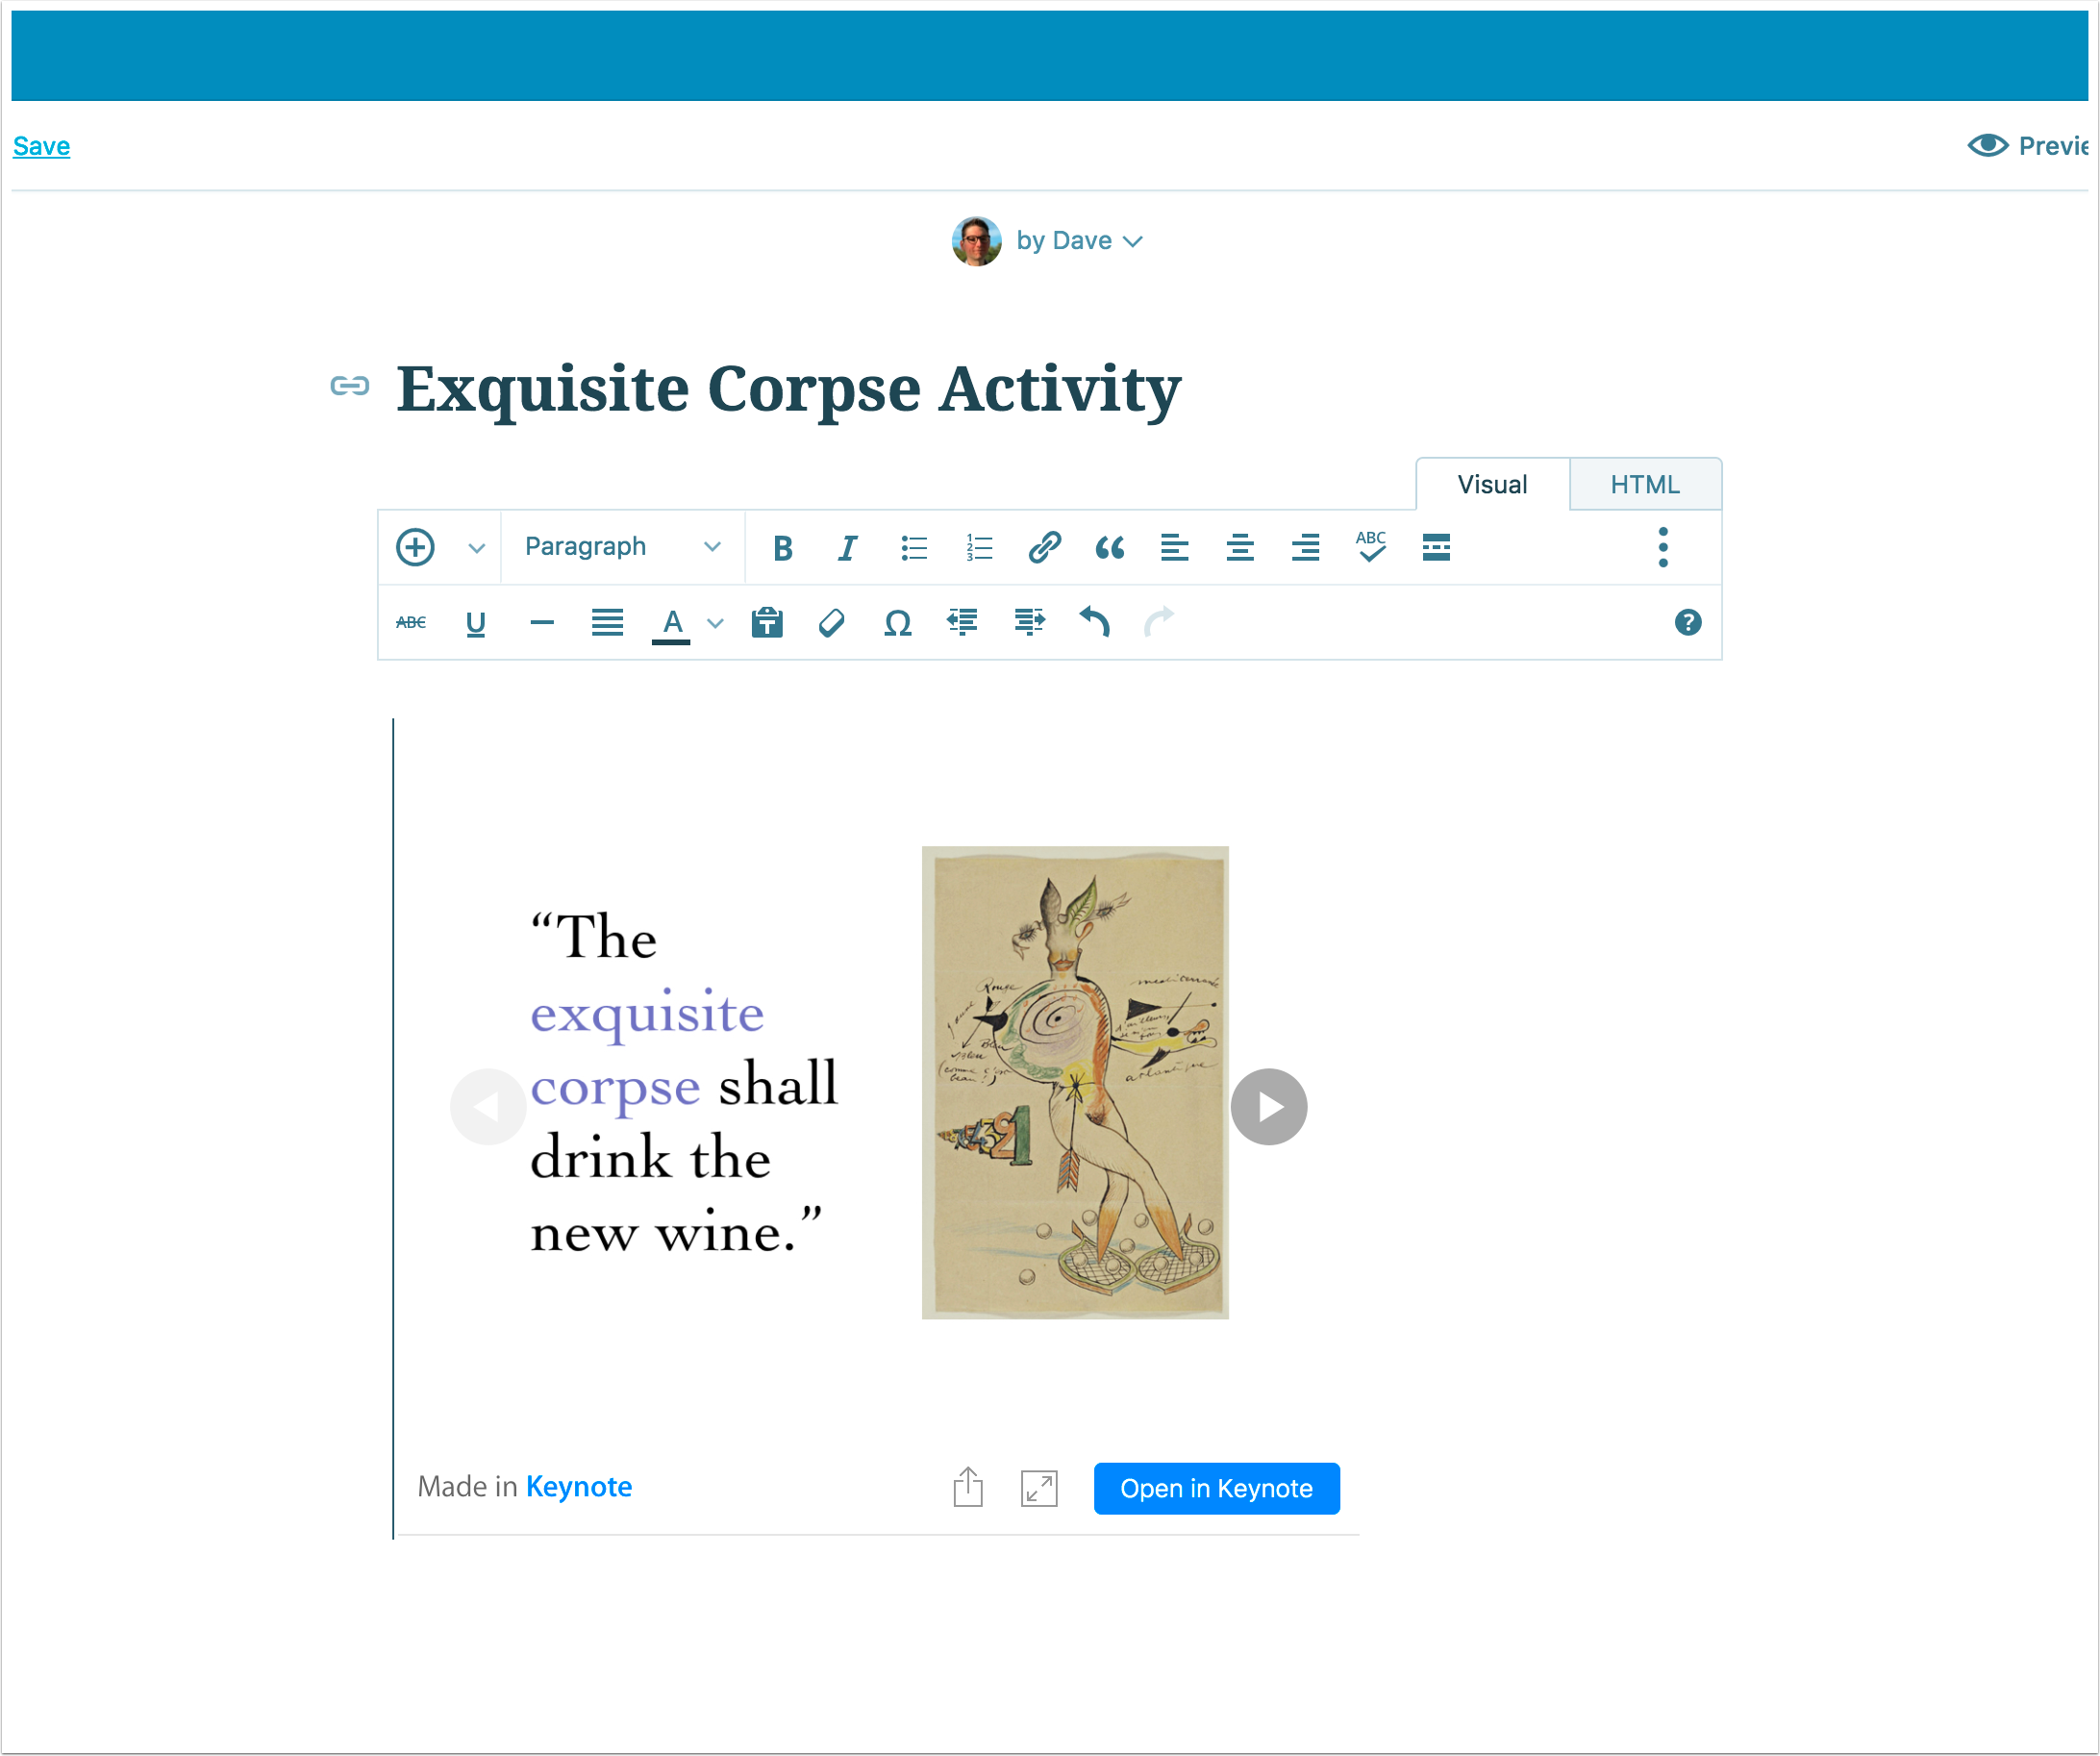
Same as Medium. Just paste the URL into the Visual Editor and hit Enter. It will be replaced with a shiny new embedded slide show.
Post using an iframe elsewhere.
You can also post your Keynote slides as an iframe anywhere else, such as a self-hosted WordPress site like this fine establishment. It takes just a little looking around the code from the WordPress.com embed, and the formula is pretty clear. Start with the URL straight from Keynote’s share menu. Mine looks like this:
You may want to tweak the width and height numbers to suit your needs. Apple made them 100% and 100%, but that isn’t going to work for this kind of context.
Example!
Note that this feature does not currently do much more than a straight-on shot of each slide. It doesn’t do transitions or even simple builds. So you may have to design slides expressly for this purpose. Also, if you’re using any fonts outside of the collection available on iCloud Keynote, they probably won’t render correctly. But even with all those caveats, this is still a dang cool feature that I’m hoping to use a lot.
Resolutions tend to be arbitrary and unrealistic. The new year is also somewhat arbitrary. However, the holiday break does allow me a bit of time to reflect on where I am in my life and my career, and that’s worth doing.[1] Instead of resolutions, I’m going to focus on some goals and themes for the new year.
Goal: Say no more. I have too much stuff. I like doing nearly all of it, but doing this much of even the most exciting stuff can be stressful.
Strategy: Default to “no”. I’m an appeaser. I tend to always say yes because I was taught to be nice. The new strategy is any time I’m asked to do something, my default is no. Convince me.
Strategy: “Hell yes” or bust. I read this somewhere, so I’m not claiming it as my own. My new barrier for a “yes” is that if the answer isn’t “hell yes!”, then it must be “no”.
Goal: Be outside more. I’ve lived in Florida for four years, and I’ve probably spent less time outside than when I lived in Michigan for the six years prior. This is particularly weird, since the four years in Florida coincides with some healthy lifestyle changes.
Strategy: Run outside, dummy. Yes. I live in the Sunshine State and do cardio inside. My new default will be to run outside. Because Florida.
Strategy: Find good gear. Ok. This is actually cheating, as I’ve already done it. I got some sweet new running shoes in November.
Goal: Make more music. I really like making things for my various work responsibilities. I do honestly get some creative satisfaction from writing a really good assignment, slide presentation, or multiple choice question. But that’s not the same as having written a thing and hearing it performed. I think I’m actually procrastinating on my writing by working.
Strategy: Let work slide when it’s not on the schedule. This is going to be hard. I like being thought of as a dependable person. I’m going to start dividing my schedule into specific times for course prep, grading, etc. If it doesn’t get done in that window. I’ll pick it up during the next one.
Strategy: Schedule listening time and writing time. I’m particularly embarrassed that I’m writing this down, since it’s something I ask my students to do all the time. In fact, I have actually asked students to show me their Google/iCal/Outlook/paper calendars with these things blocked out. By following the previous strategy, I think (hope?) that this one will become more manageable.
For those living on an academic or orchestra-style fall-winter-spring calendar, I also recommend an “annual review” of sorts in May(ish). ↩
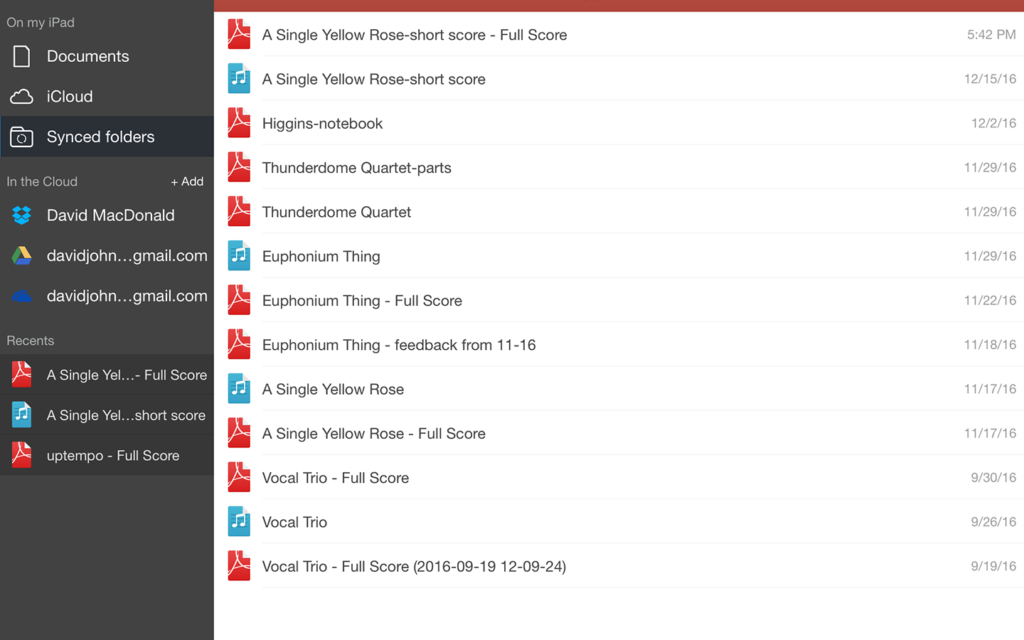
These four apps and services have allowed me to move almost completely away from paper printouts.
This fall, I wrote about how I had used my iPad Pro and Apple Pencil to replace the need for paper scores in my composition lessons. Since then, I've continued to revise and expand my technology use into a completely paperless workflow for working with composers.
I'm sure I'll continue to refine the system as long as I use it; but, I think in its current state, the basics are working quite well. I have a few key goals for both me and the composers I'm working with. First, it needs to be simple and automatic. If it's hard for my students to set up, they will forget something important; if I need to remember to do something, I'll forget that, too. Second, it needs to be as transparent and reliable. My students and I need to trust that when they submit something to me, I will receive it; I need to know that when I send feedback, it will be read and accounted for. I never want my students to be unsure of what I expect of them. Teaching open-ended creative work has plenty of hand-wavy ambiguity already. My computers shouldn't add any. If possible, they should eliminate some.
The beginning: GoodNotes
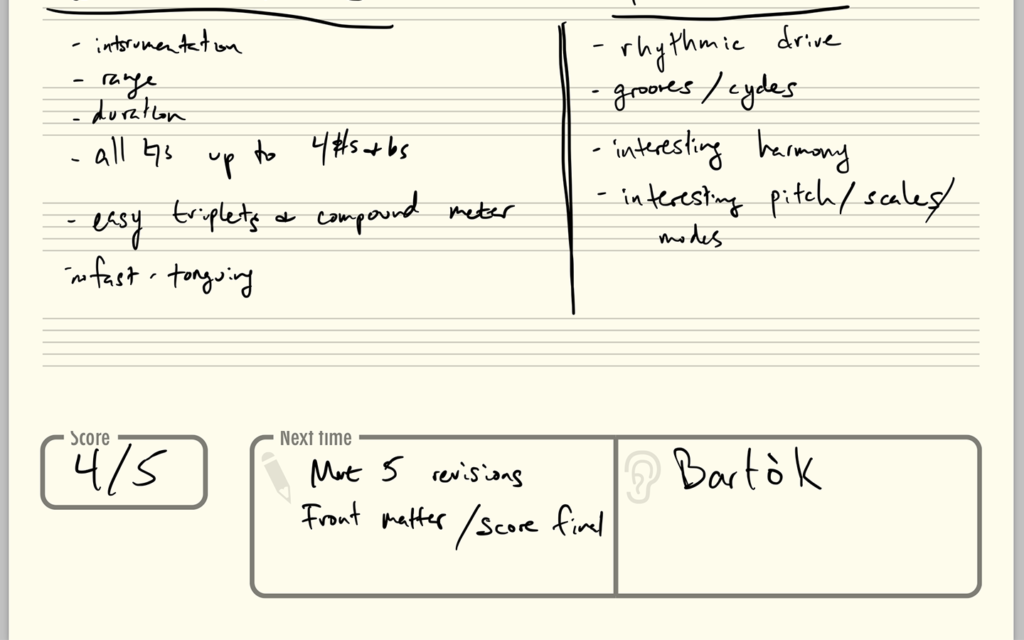
I keep a digital notebook for each composer in my studio. There, I record their compositional goals1, upcoming recital ideas, and notes on what we discuss in each lesson. I do this on my iPad Pro in GoodNotes, which has a number of excellent features for my purposes.
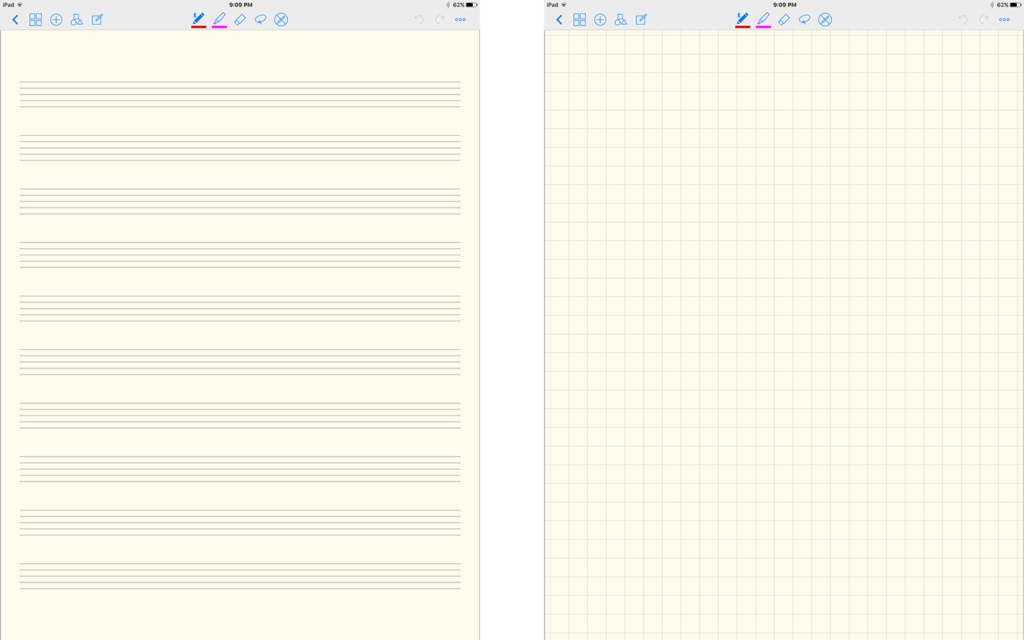
Here are two of my most-used default GoodNotes templates.
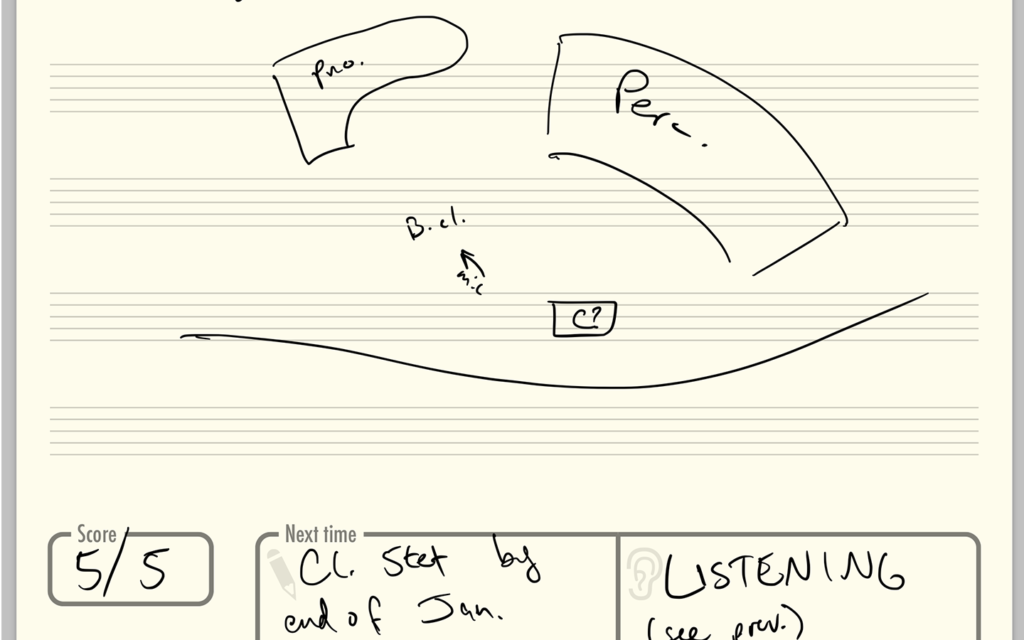
GoodNotes notebooks are open-ended sketchbooks. They can include writing, drawing, text, and photographs. So I'm not limited to words; I often draw music notation, music-like sketches, timelines, and stage diagrams. These notes are sync'd to other iOS devices and Macs over iCloud. This is handy if I ever need to make a quick reference from my phone, or if I want to type a long paragraph of text on my Mac. GoodNotes also allows notebooks to be backed up as PDFs to Dropbox, Google Drive, OneDrive, or Box. I want my students to always know what I'm expecting of them, so I give each of them a link to their notebook PDF in my Dropbox. That way, they can refer back to previous lesson notes and remind themselves of what they're expected to be working on for next time.
I write notes during the lesson for future reference by me and the composer. Often, it’s a simple list of concepts, composers, or techniques we discussed.
The open canvas in GoodNotes is particularly handy for things that would be hard to type like this stage diagram.
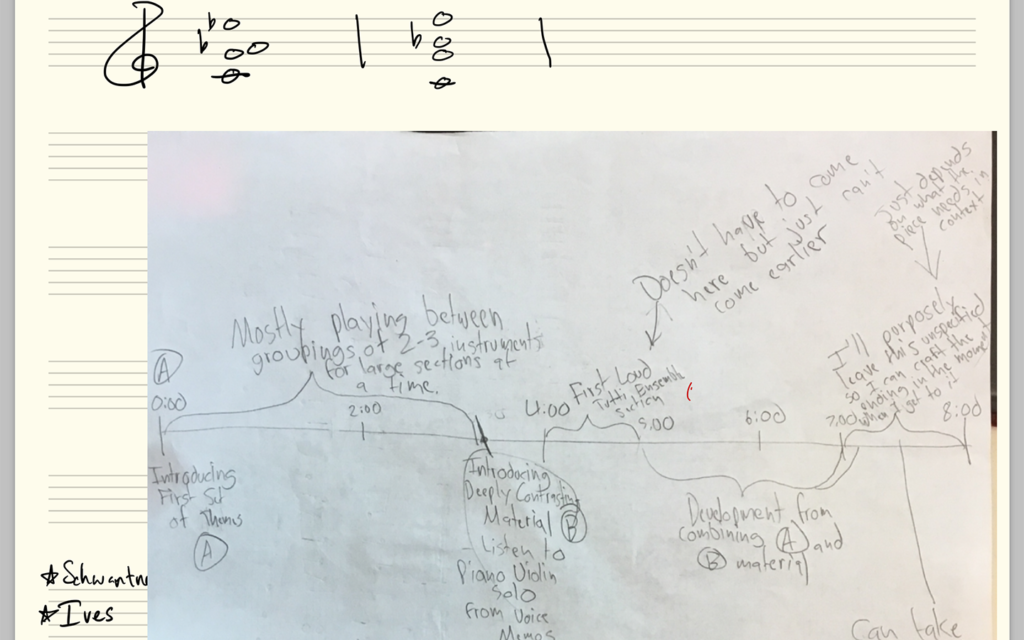
I know that I described this workflow as paperless; but, I strongly encourage my students to start all of their projects on paper. I know that I'm far from unique among composition teachers in this regard. When they bring in handwritten work, typed outlines, sketched drawings or other diagrams, I use the very handy "Add Image" feature in GoodNotes to snap a quick photo with the iPad's camera that I can bring right into the lesson notebook and write all over—the full John Madden, if you will—without feeling too self-conscious about marring the student's handwritten work.
It’s easy to bring paper and anything else I can photograph into a notebook.
So yeah, there's paper sometimes, but it's not my paper. And I'm pretty quickly ingesting the paper contents into my paperless workflow. As a side benefit, other kinds of things can go into the notebook using the same method. I've included photos of the inside of a piano and the settings on a mixer for later reference and markup.
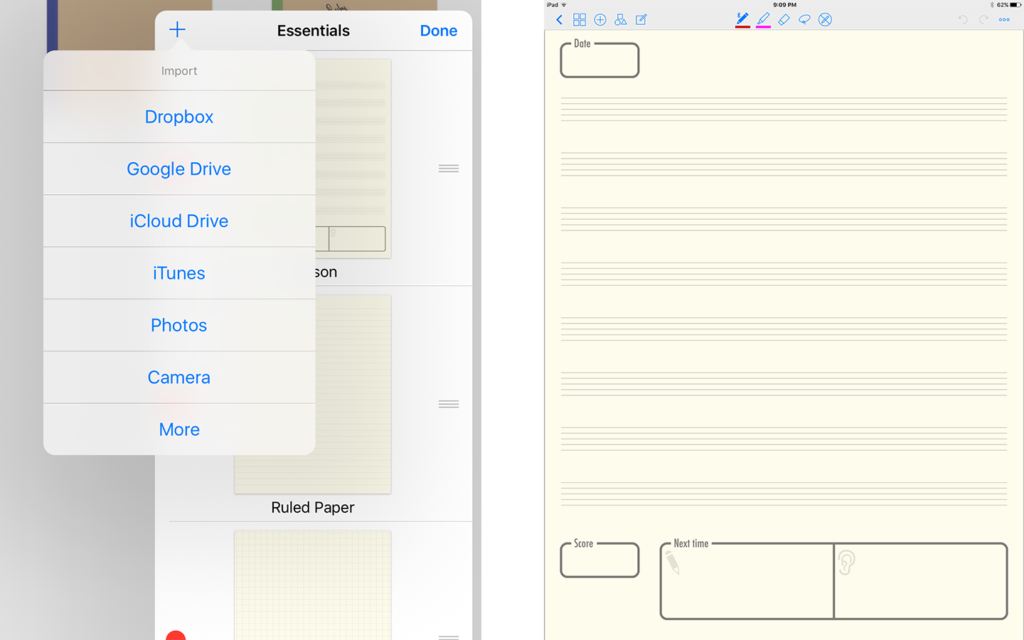
GoodNotes makes it pretty simple to bring in new “papers” or templates to use in my notebooks. Here’s the one I use for lessons.
Another excellent feature of GoodNotes is the ability to create custom "papers". GoodNotes actually ships with an extensive and useful set of papers that I use regularly, especially the staff paper and grid paper (nice for diagrams and timelines). It's very easy to export a blank paper template from GoodNotes and create your own papers to suit specific needs. For my lessons, I tweaked the default staff paper to include a space for the date, the grade for the lesson2, and what I expect them to have listened to and worked on for the next time we meet. GoodNotes Lesson Notebook Template
Transferring ideas: Dropbox
I mentioned it briefly in my description of GoodNotes, but it's worth mentioning the way I'm using Dropbox here. Each student has a shared folder that they use to submit their scores (PDF) and audio (usually MP3) prior to our meetings. If I have an article I want them to read or a score I'd like them to see, I can place it in that Dropbox as well. I have a Dropbox Premium account, so storage is not an issue for me, and the file history is great for when files are accidentally deleted or overwritten. I have the Dropbox client running on my Mac, so even if a student uploads materials immediately before the lesson, the files are right there on my computer before we're done with smalltalk.3
The business end: PDF Expert
PDF Expert was the primary focus of my love and attention in my post from August. I won't repeat too much of that here as much of it hasn't changed. However, the thing that has evolved over the semester is my methods for getting files in and out of PDF Expert.
Student uploads to Dropbox are automatically downloaded to the sync’d folder in PDF Expert.
There is a lot to love about Dropbox, but its iOS client is not one of them. Thankfully, PDF Expert has pretty good hooks into the Dropbox API so I don't have to deal with the limitations of the Dropbox client too much. It allows me to select certain folders, such as the one I share with each composer, to keep sync'd to my device. Since we're mostly dealing with PDF files and small-ish MP3s, the sync is pretty quick and doesn't take up too much space on my iPad (which has 128GB storage, plenty for this use). The sync here isn't quite as quick as on my Mac, but a pull-to-refresh gesture will force PDF Expert to check for new changes and download them.
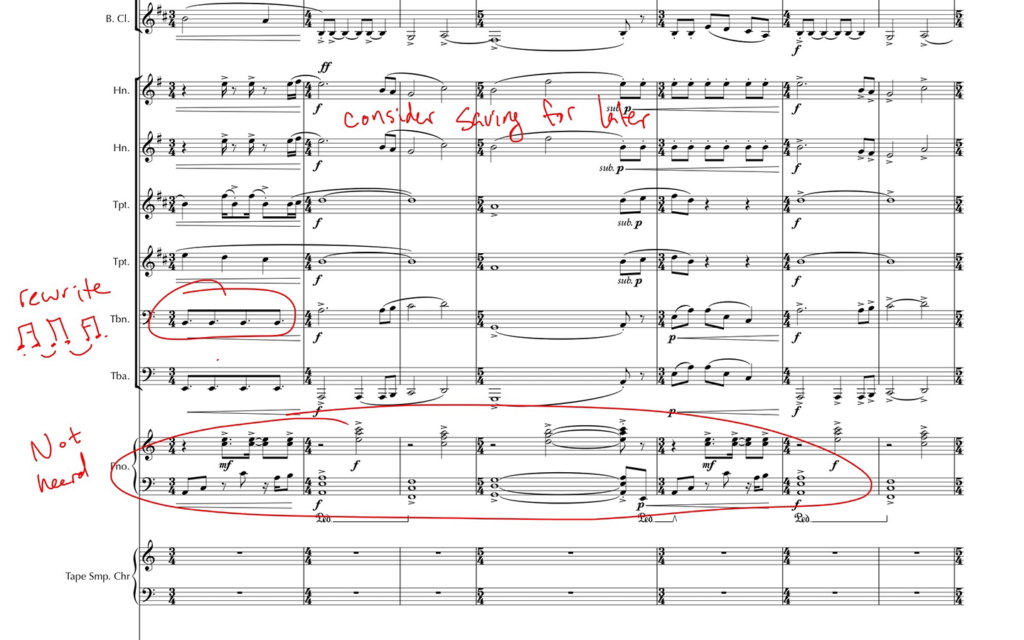
Marked up scores like this are sync’d back to the student’s shared Dropbox folder right alongside their lesson notebook.
Throughout the lesson, I write on the student's score in PDF Expert using colored pencils, highlighters, and typed text. Each changes if very quickly sync'd back to the Dropbox folder, and students will get to see these as they continue working. Because this is happening on a PDF copy of the file rather than the Sibelius or Finale files (I don't think any of my students has jumped into Dorico yet), they won't overwrite my comments until they upload a fresh score the following week, and if they really need them, they could always change the file name anyway.
Conclusions
Probably my favorite part of the workflow that I've outlined here is that functionally, it's nearly identical to my ideal paper workflow from a pedagogical standpoint. It focuses on eliminating the most cumbersome and mistake-prone elements of my paper workflows and adds a number key benefits for both me and the composers I'm working with each week. I think my students have written more and improved faster this semester thanks to the newly clarified expectations, and I'm spending less time and energy keeping track of stacks of paper and moving notebooks around.
Each term begins with composers setting goals for what they want to write in the near future. We discuss how these projects will contribute to a well-rounded portfolio and encourage them to stretch out and try new ideas and techniques. ↩
I give each student a grade from 1-5 based on their lesson preparation. They're evaluated based on what we had discussed the previous week, so this is another reason it's so handy to share the notebooks. It's also nice to show them right there in the lesson what grade they got to make sure they are aware of how they're doing and understand what the expectations are from week to week. Lastly, I don't always log in to the LMS right away to enter the grade, so this is a nice way for me to make a quick note for myself. I usually enter all the previous grades on Monday morning as I flip through notebooks to prepare for the week ahead. ↩
I mentioned earlier that I shared a Dropbox link to the lesson notebook PDFs. That was a slight over-simplification. I actually have a background service which copies a lesson notebook into each student's shared folder any time it is updated. That app is called Hazel, and it's wonderfully nerdy but a bit beyond the scope of this write-up. ↩